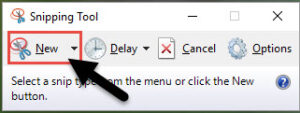
The Microsoft corporation is providing a default inbuilt tool that is SNIPPING Tool. It is almost available in all windows operating systems. By using this we can quickly snippet anything available on the screen of system. It’s provide the images in the format of 1080 pixels. They are doing great enhancements in every new version OS for better performance and clarity purpose. In earlier versions, it had some draw backs. Like while taking the snap shot, before that, A small window appear when we open the this tool right like as below image. It will include in that snapshot until unless we take off. But in the present versions like window 8/8.1/10/10pro, it will automatically hide from the screen.
How To Get :
- You can get by simply search the tool key word like snipping in the search field of START Button.
OR - Go to All Programs, in that choose window tool library. From that you can get it.
- Then pin it to Task bar of the system for easy use.
How to Use :
- First of click on the tool button. Then small new window appear like as above image. Then there is a option like New with scissor symbol.
- Click on that, then that window will disappear and new cursor with the symbol of plus will appear. And also it converts the normal screen to shade screen.
- Now by using that cursor, Drag it where ever you want to snippet on the screen.
- Now save and use. That’s it.
Additionally Available features :
There are plenty of features are available in this tool. You should know and as well as know, how to use those things in a effective manner.
Here we go…
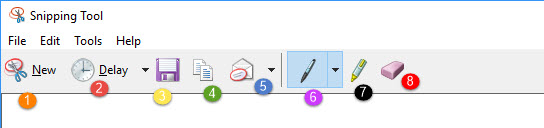
- These are the total eight features exist in the this tool. First one is general option to take a snap-shot.
- Second option is “Delay”. Here you can set the time for to delay the snipping after you took snap.
- You can delay it up to 5 seconds. Default it is ‘0’sec only.
- Now third one s used to SAVE the snap.
- Next one is COPY button, But no need to use it because default copied the mage when you took snap_shot. So, you can directly pate it in any file.
- Fifth option is used to add it to Email recipient as attachment or image.
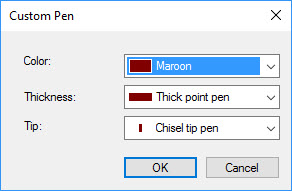
- The next one is PEN-option. I’ll help you to draw anything on the snap-shot. You can also customize it by setting the options like COLOR, THICKNESS and TIP of the pen.
- By using the button, Highlighter any where on the snap-image with Yellow color only.
- Last one is Eraser. You can rub what ever you highlighted or what ever you written on the snap-image.
“If you like this Article, Hit me with Facebook like button or Share it and If you have any doubts, Let me know as comment as below”